Hexo在GitHub上搭建博客
Hexo 在GitHub上搭建博客
这个博客搭建也有一段时间了,记录一下这个博客是怎么搭建的吧,万一以后还要用呢,写下了以后直接抄作业更香一点
创建 GitHub repository
进入GitHub,选择右上角的加号,New repository,命名为 GitHub用户名.github.io
然后就可以直接创建了,其他的不用管
进入刚创建的库,先创建一个 index.html 的文件

文件创建好后,选择 Settings –> Pages –> Source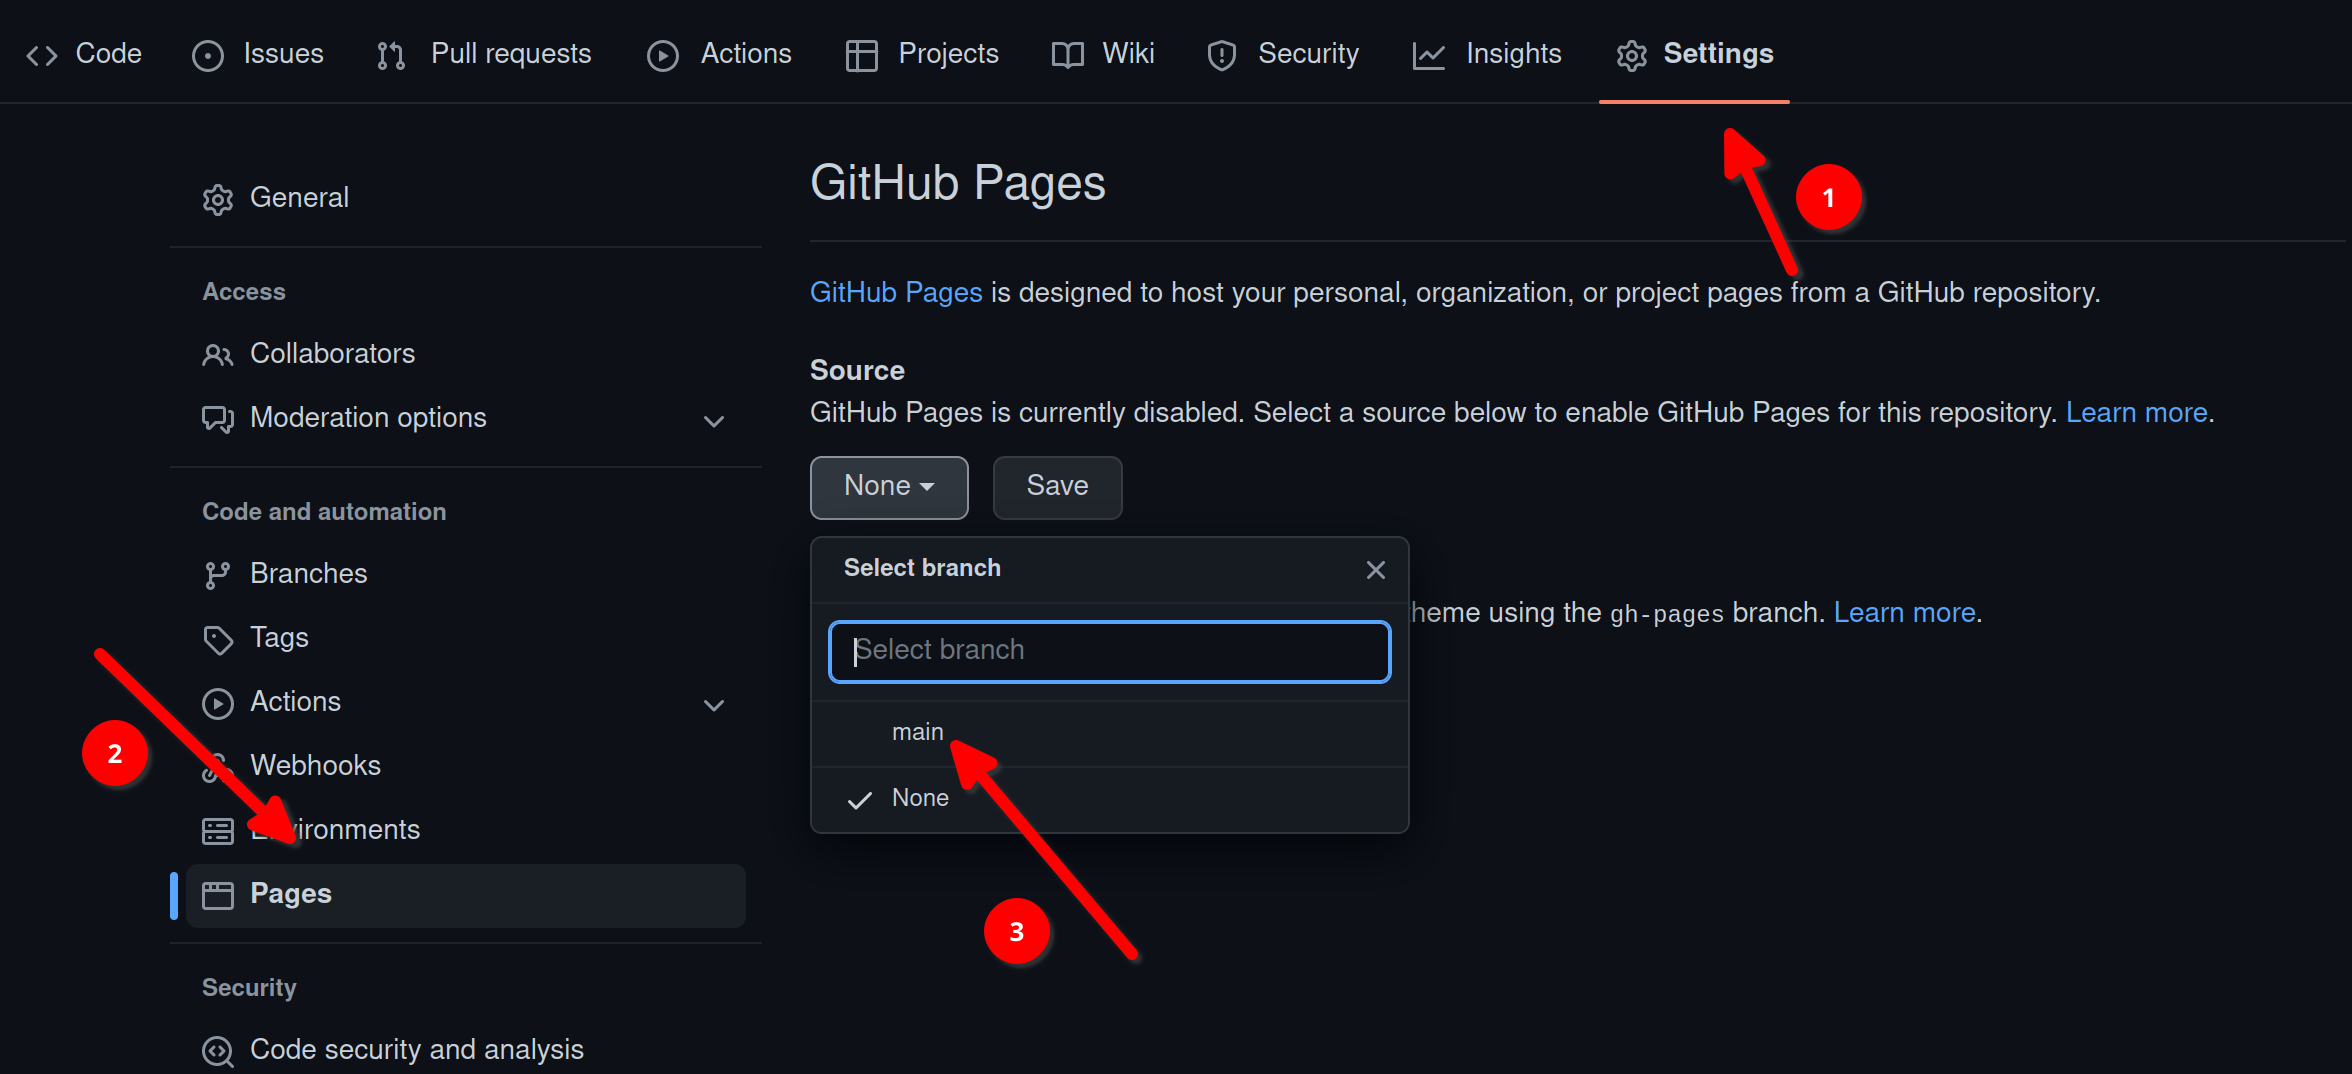
等待一会,就能能通过浏览器打开刚刚创建好的网页了
http://GitHub用户名.github.io/
Git 设置
如下设置Git的信息
1 | |
生成 ssh 秘钥:
1 | |
进入 .ssh 文件,查看公钥并复制下来
1 | |
打开 Settings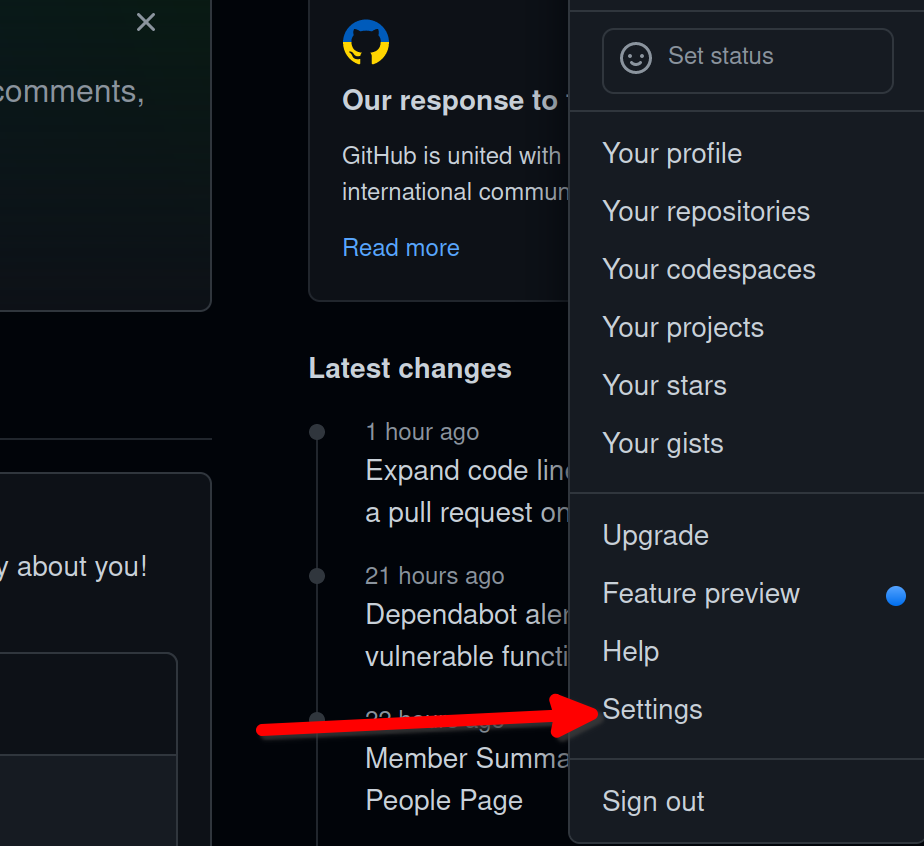
把刚复制下来的公钥加入到 SSH keys 中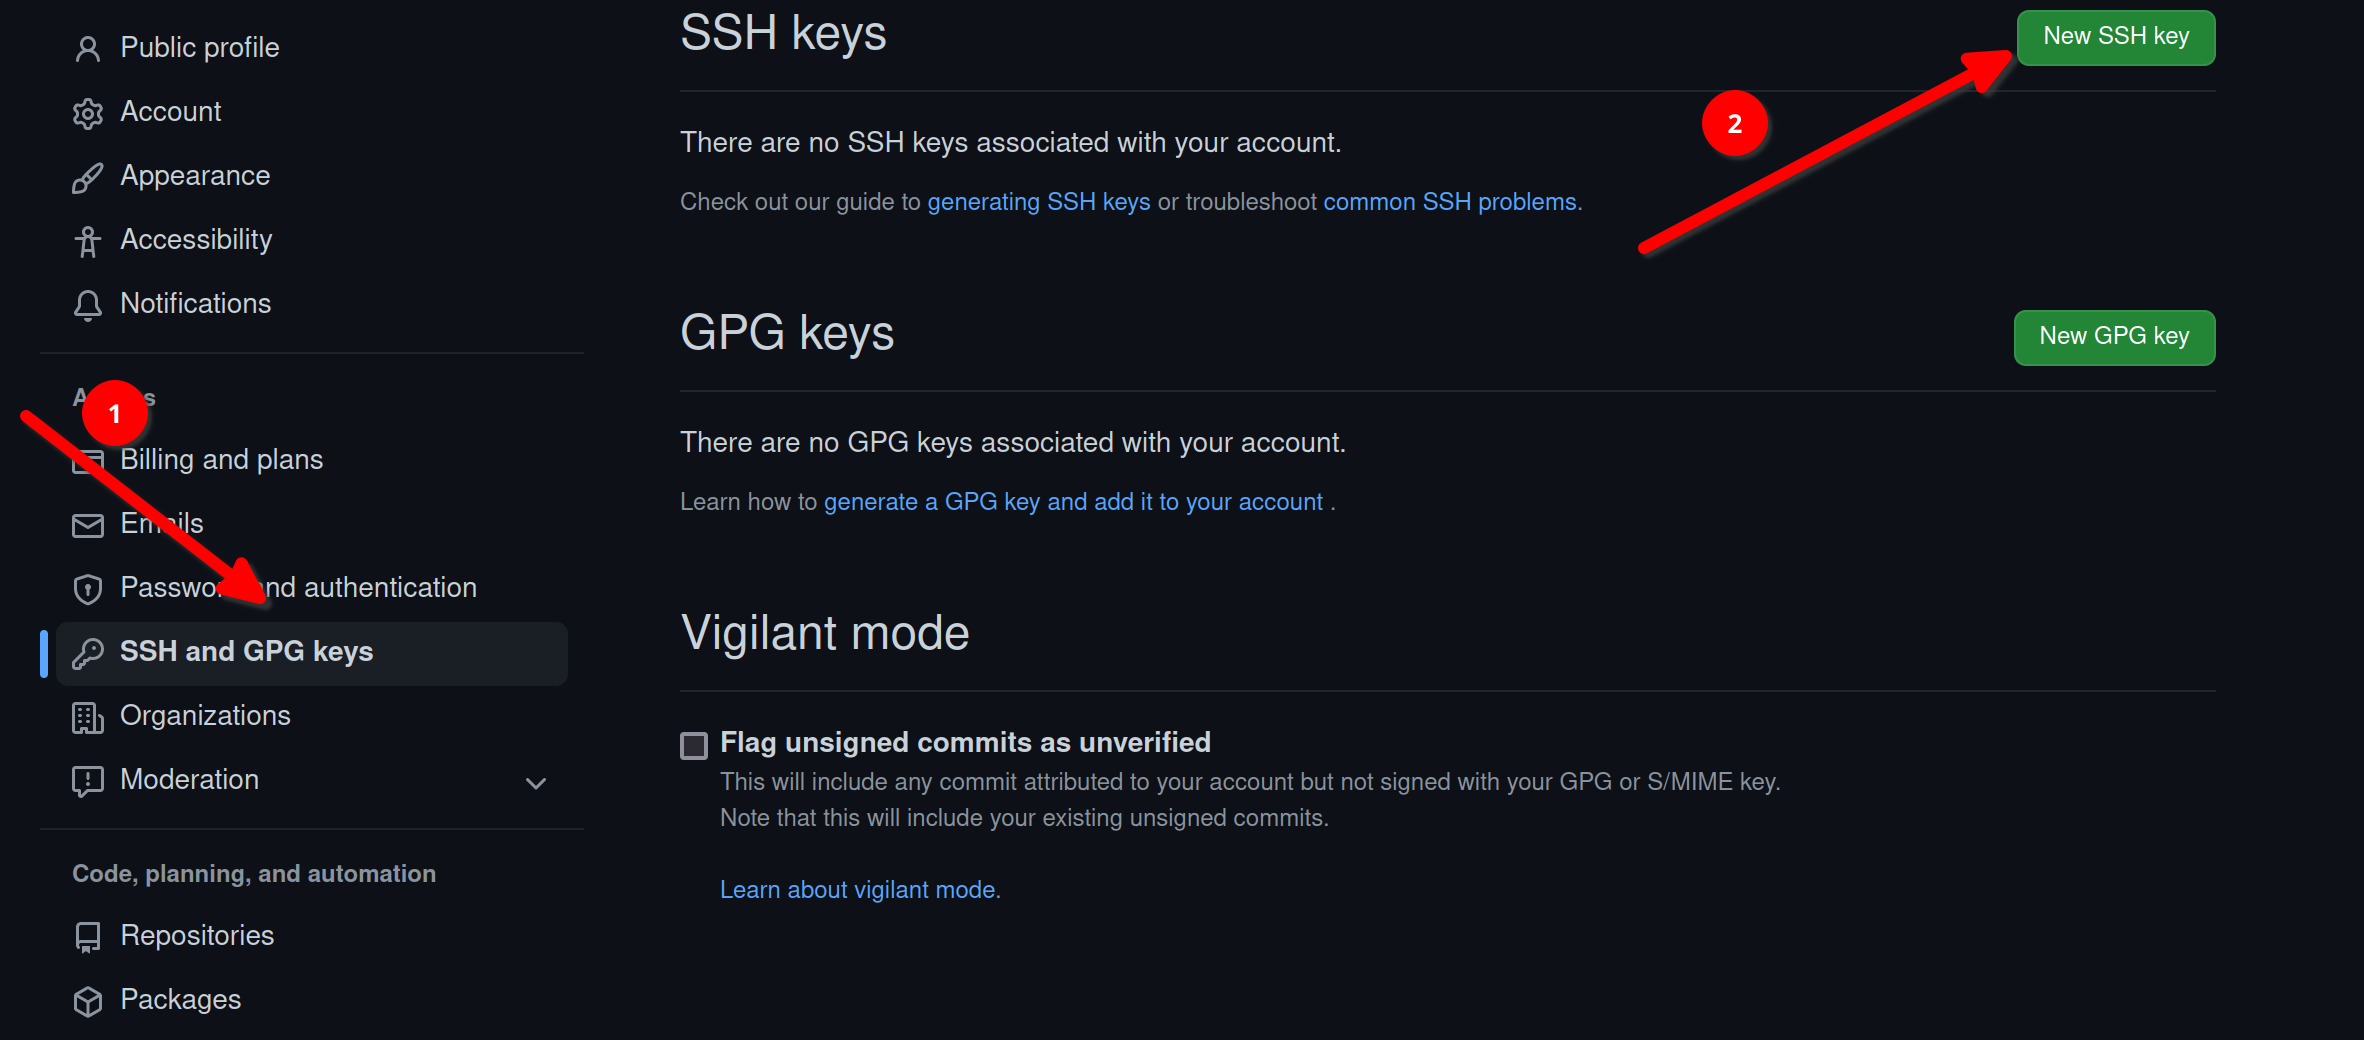
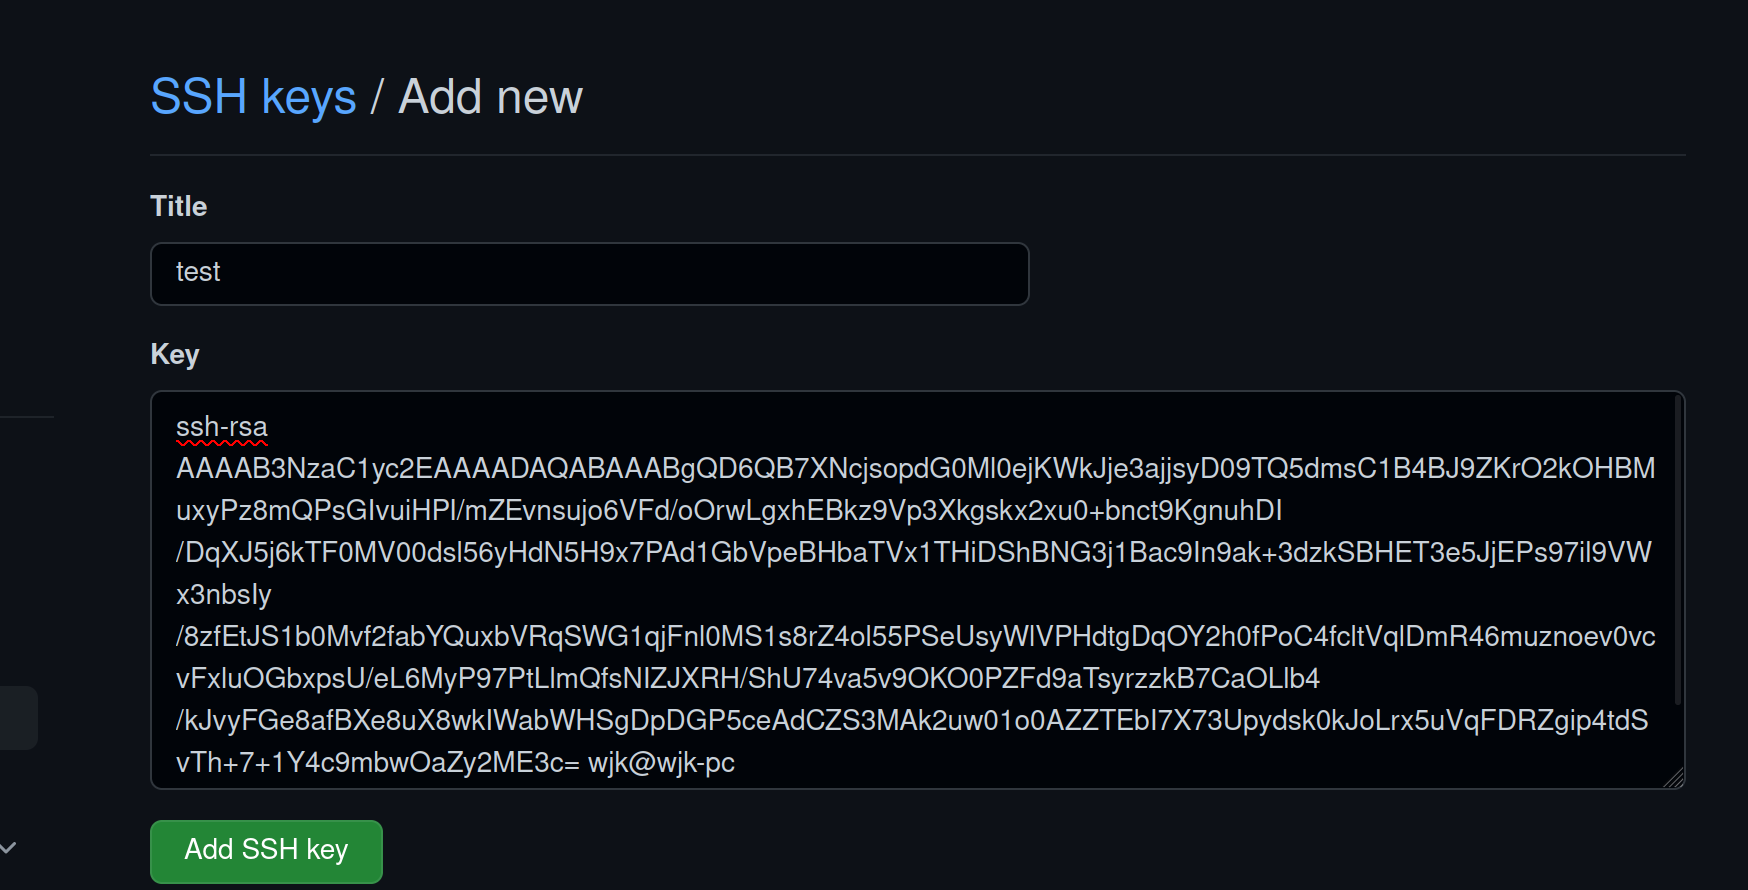
回到终端测试是否连接库成功
1 | |

安装 node.js
安装 Node.js,ArchLinux 的库中有,可以直接安装
1 | |
检查 npm 是否安装
1 | |

安装 Hexo
使用 npm 安装 Hexo
1 | |
创建博客的目录
1 | |
初始化博客
1 | |
进入博客的目录,继续执行下面的命令
1 | |
安装成功后的Blog目录下有如下文件
测试网址是否搭建成功
1 | |
- g: generate 的简写,生成静态文件
- s: server 的简写,启动服务器,默认是在本地
打开浏览器,输入 127.0.0.1:4000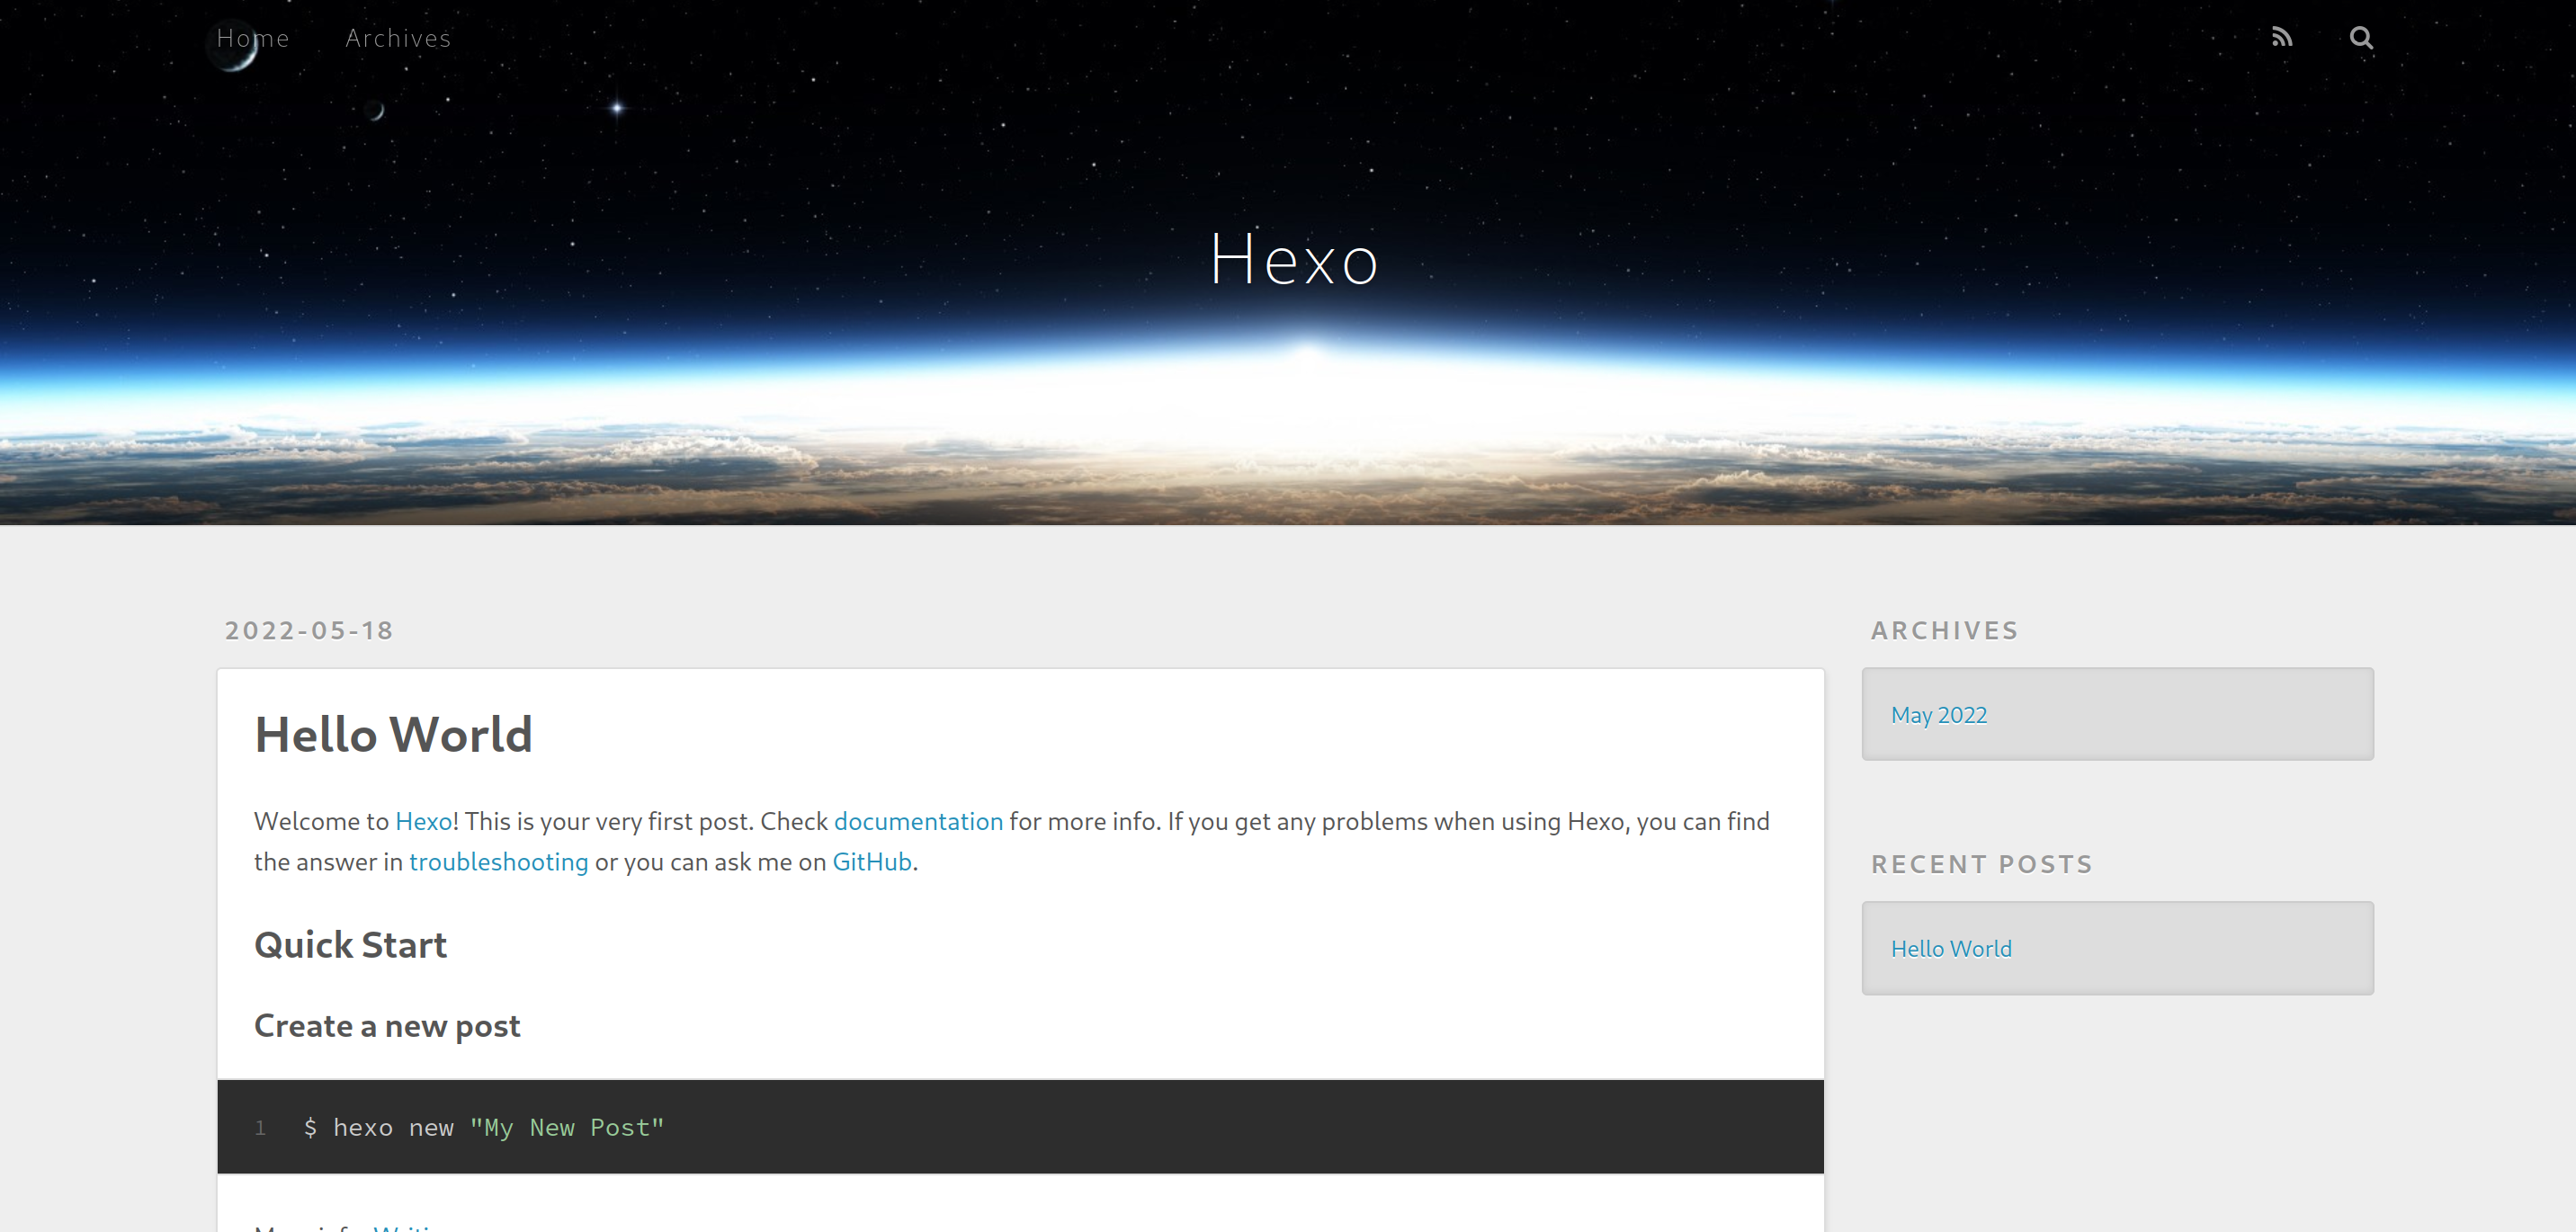
推送博客到 GitHub
在博客的根目录下,有一个 _config.yml 文件,编辑这个文件
1 | |
在文件的最下面,有一个 deploy 模块,修改这个模块
1 | |
网址直接在GitHub的库里复制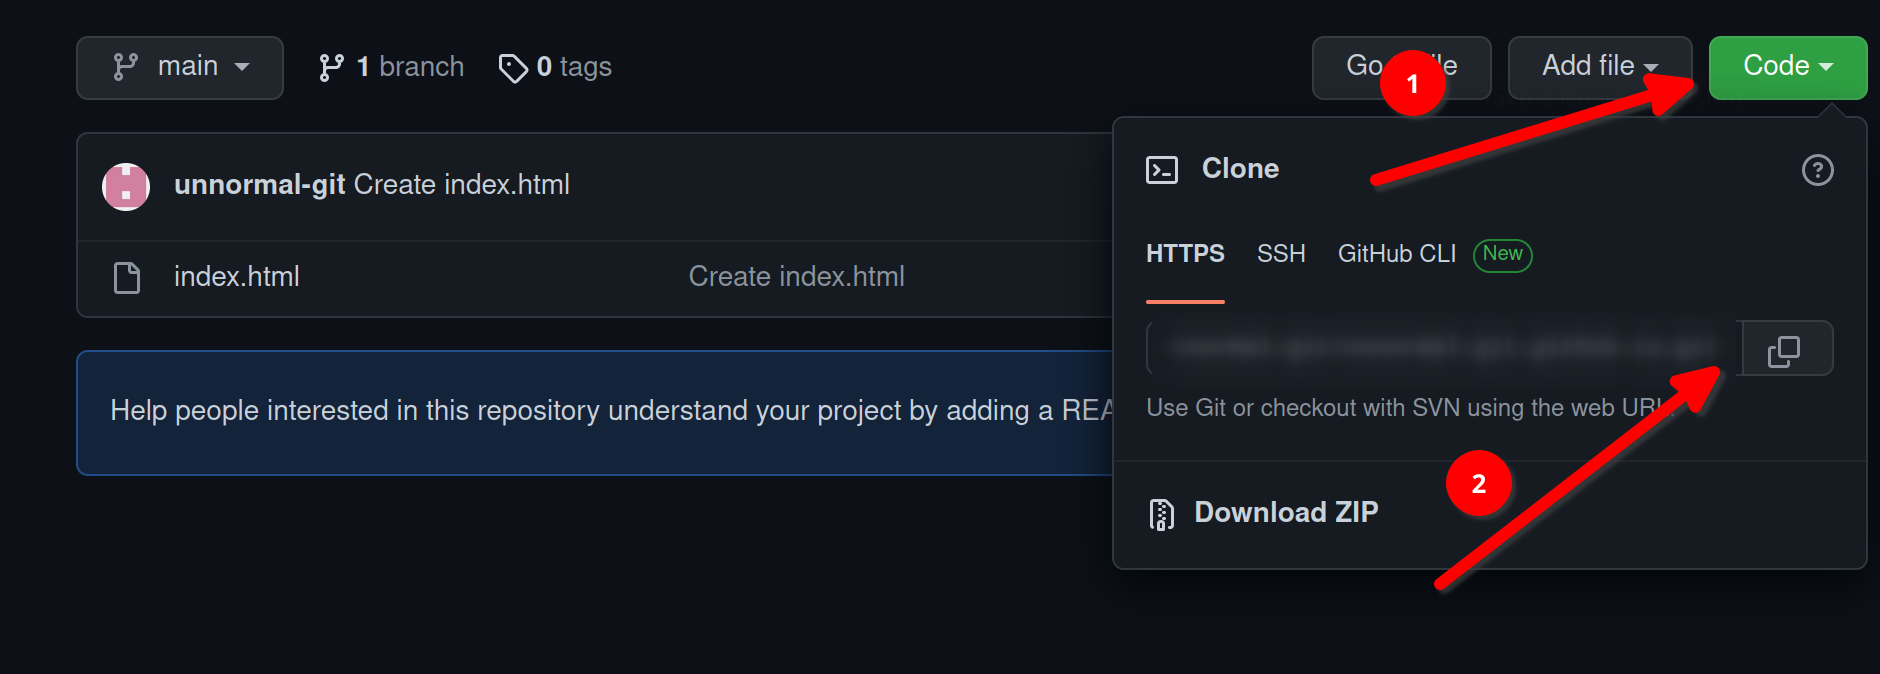
退出并保存
再安装 Git 部署插件
1 | |
推送博客到GitHub
1 | |
- clean: 清除缓存文件
- d: deploy 的简写,部署网站
如果碰到如下报错导致无法提交的情况↓
1 | |
解决方法
打开 Github 的 Settings
进入 Developer settings
打开 Personal access tokens
点击 Generate new token,生成一个新的 token,在输入密码的时候输入这个 token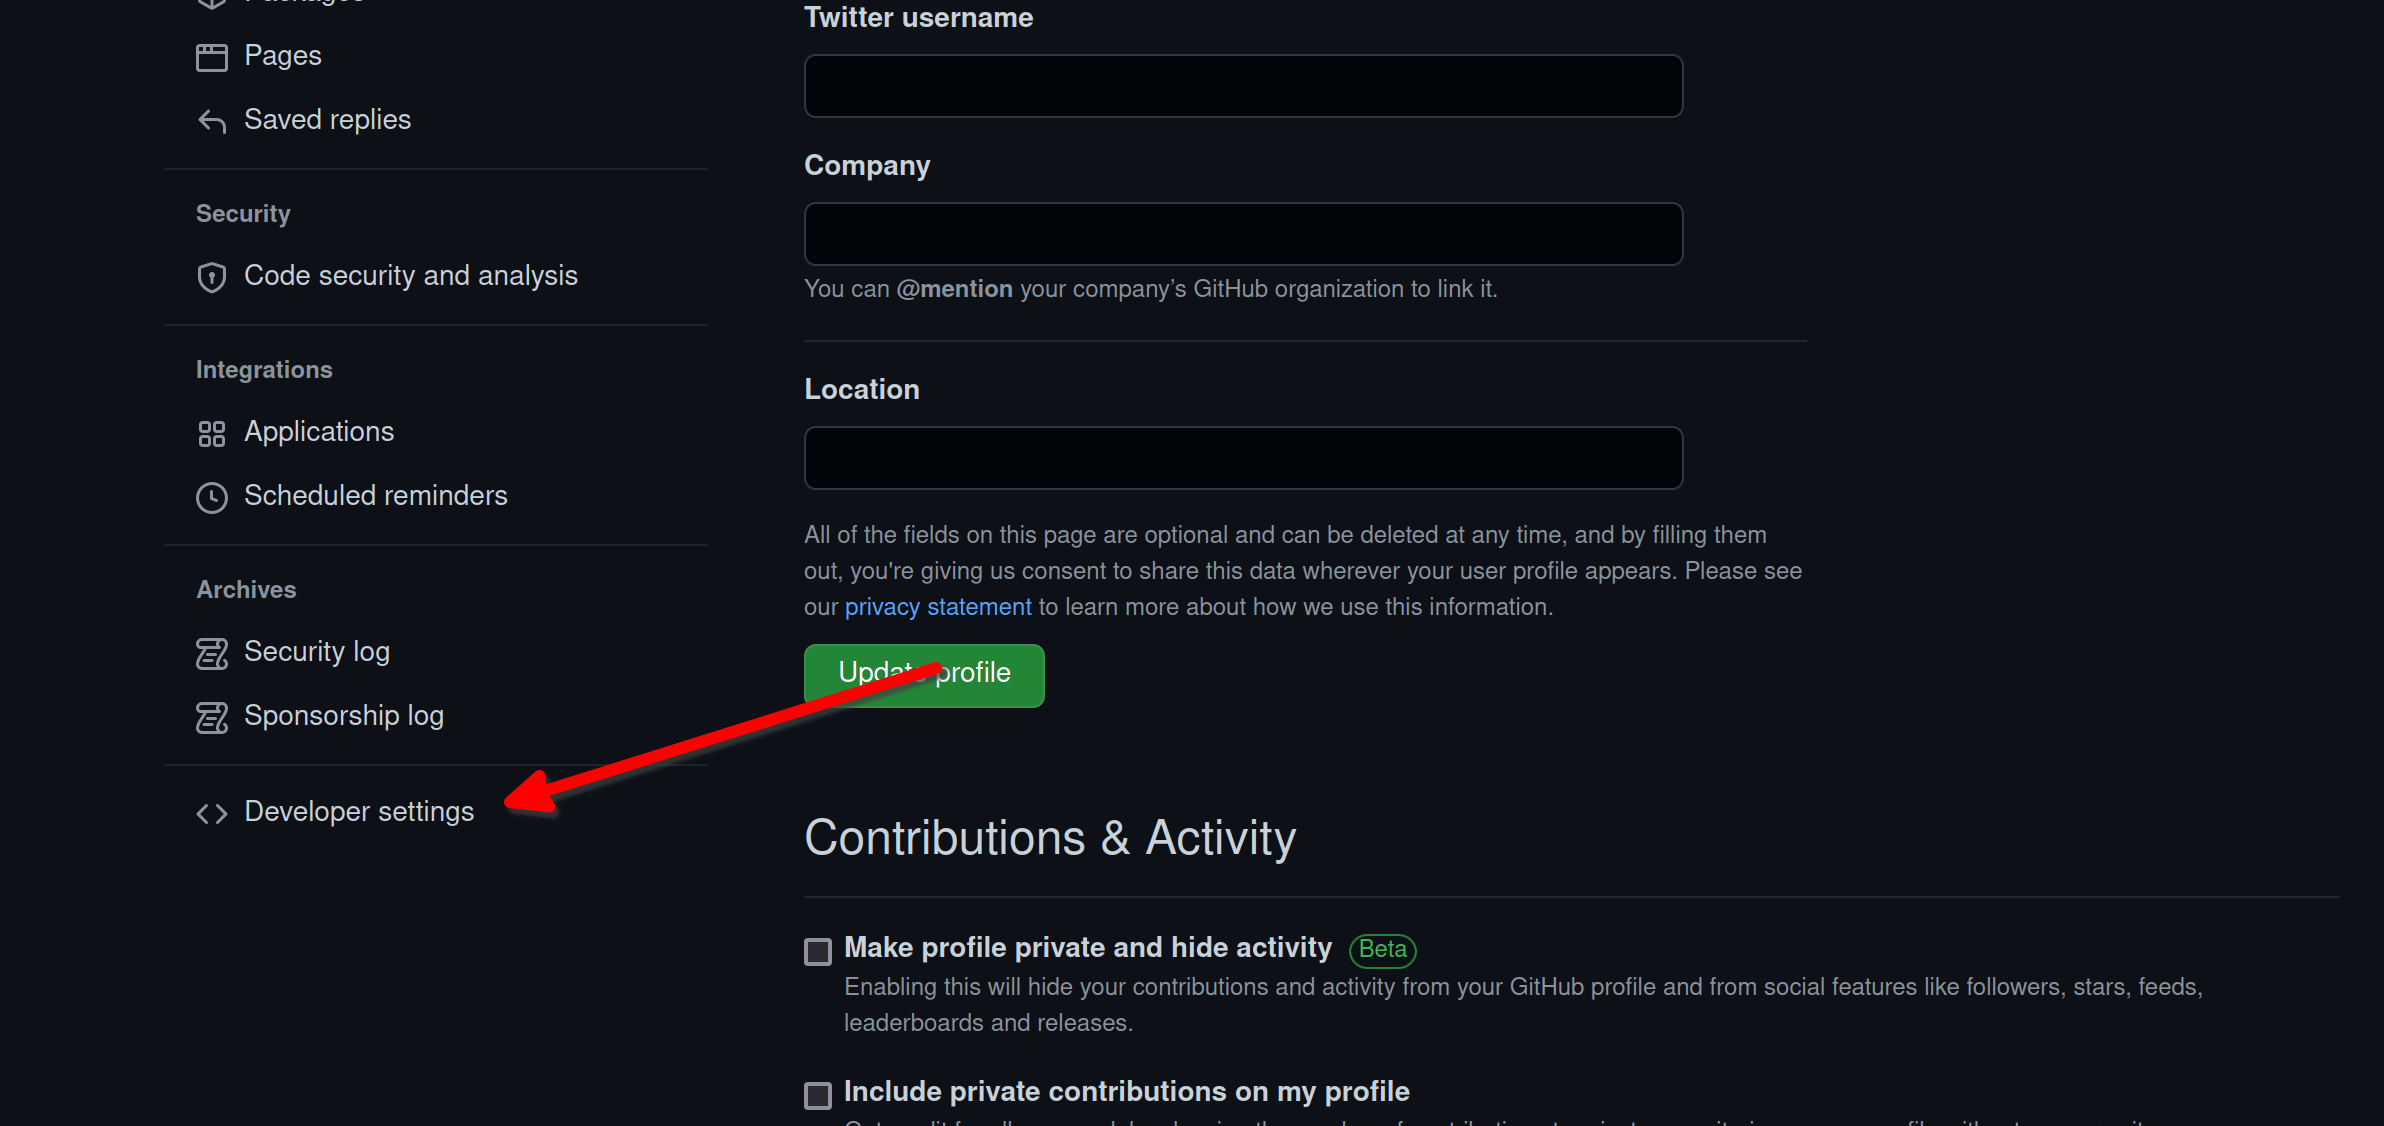
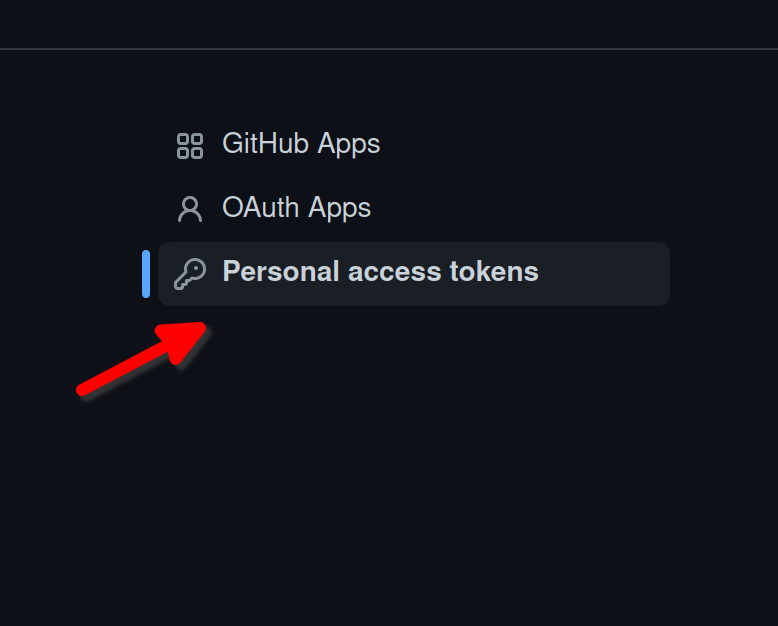
出现这种情况的原因是因为 GitHub 已经不再采用密码登录了,所以每一次上传都需要这个 token
这样做十分麻烦,所以在前面设置项目地址的时候,可以不设置为 HTTPS,而设置为 SSH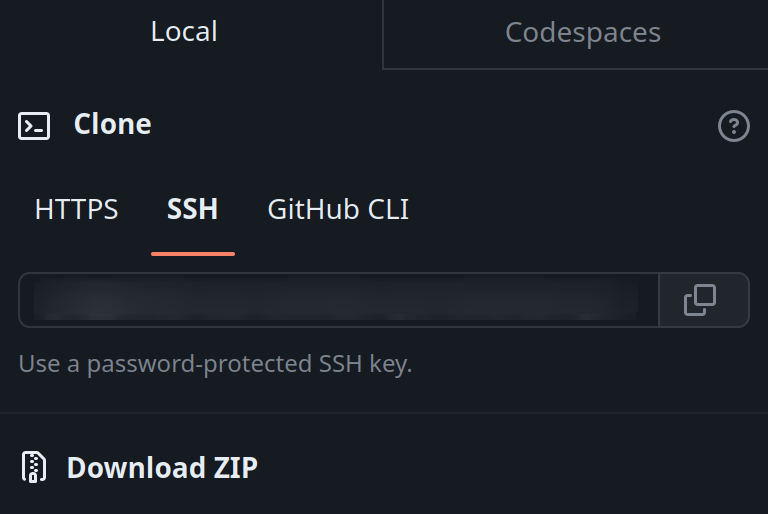
这样就能通过浏览器打开放置个人网站的仓库路径,博客搭建完成
域名
先到 https://www.namesilo.com/ 上注册一个账号,购买一个域名


进入管理我的域名页面
管理 DNS
这里要添加两种解析,一种是 A ,一种是 CNAME,A 类解释是下面四个
1 | |
CNAME 的目标地址就是博客的地址
最后在博客的 source 目录下创建一个 CNAME 文件,里面就写买好的域名
再打开 GitHub 博客的库,进入 Settings –> Pages,设置域名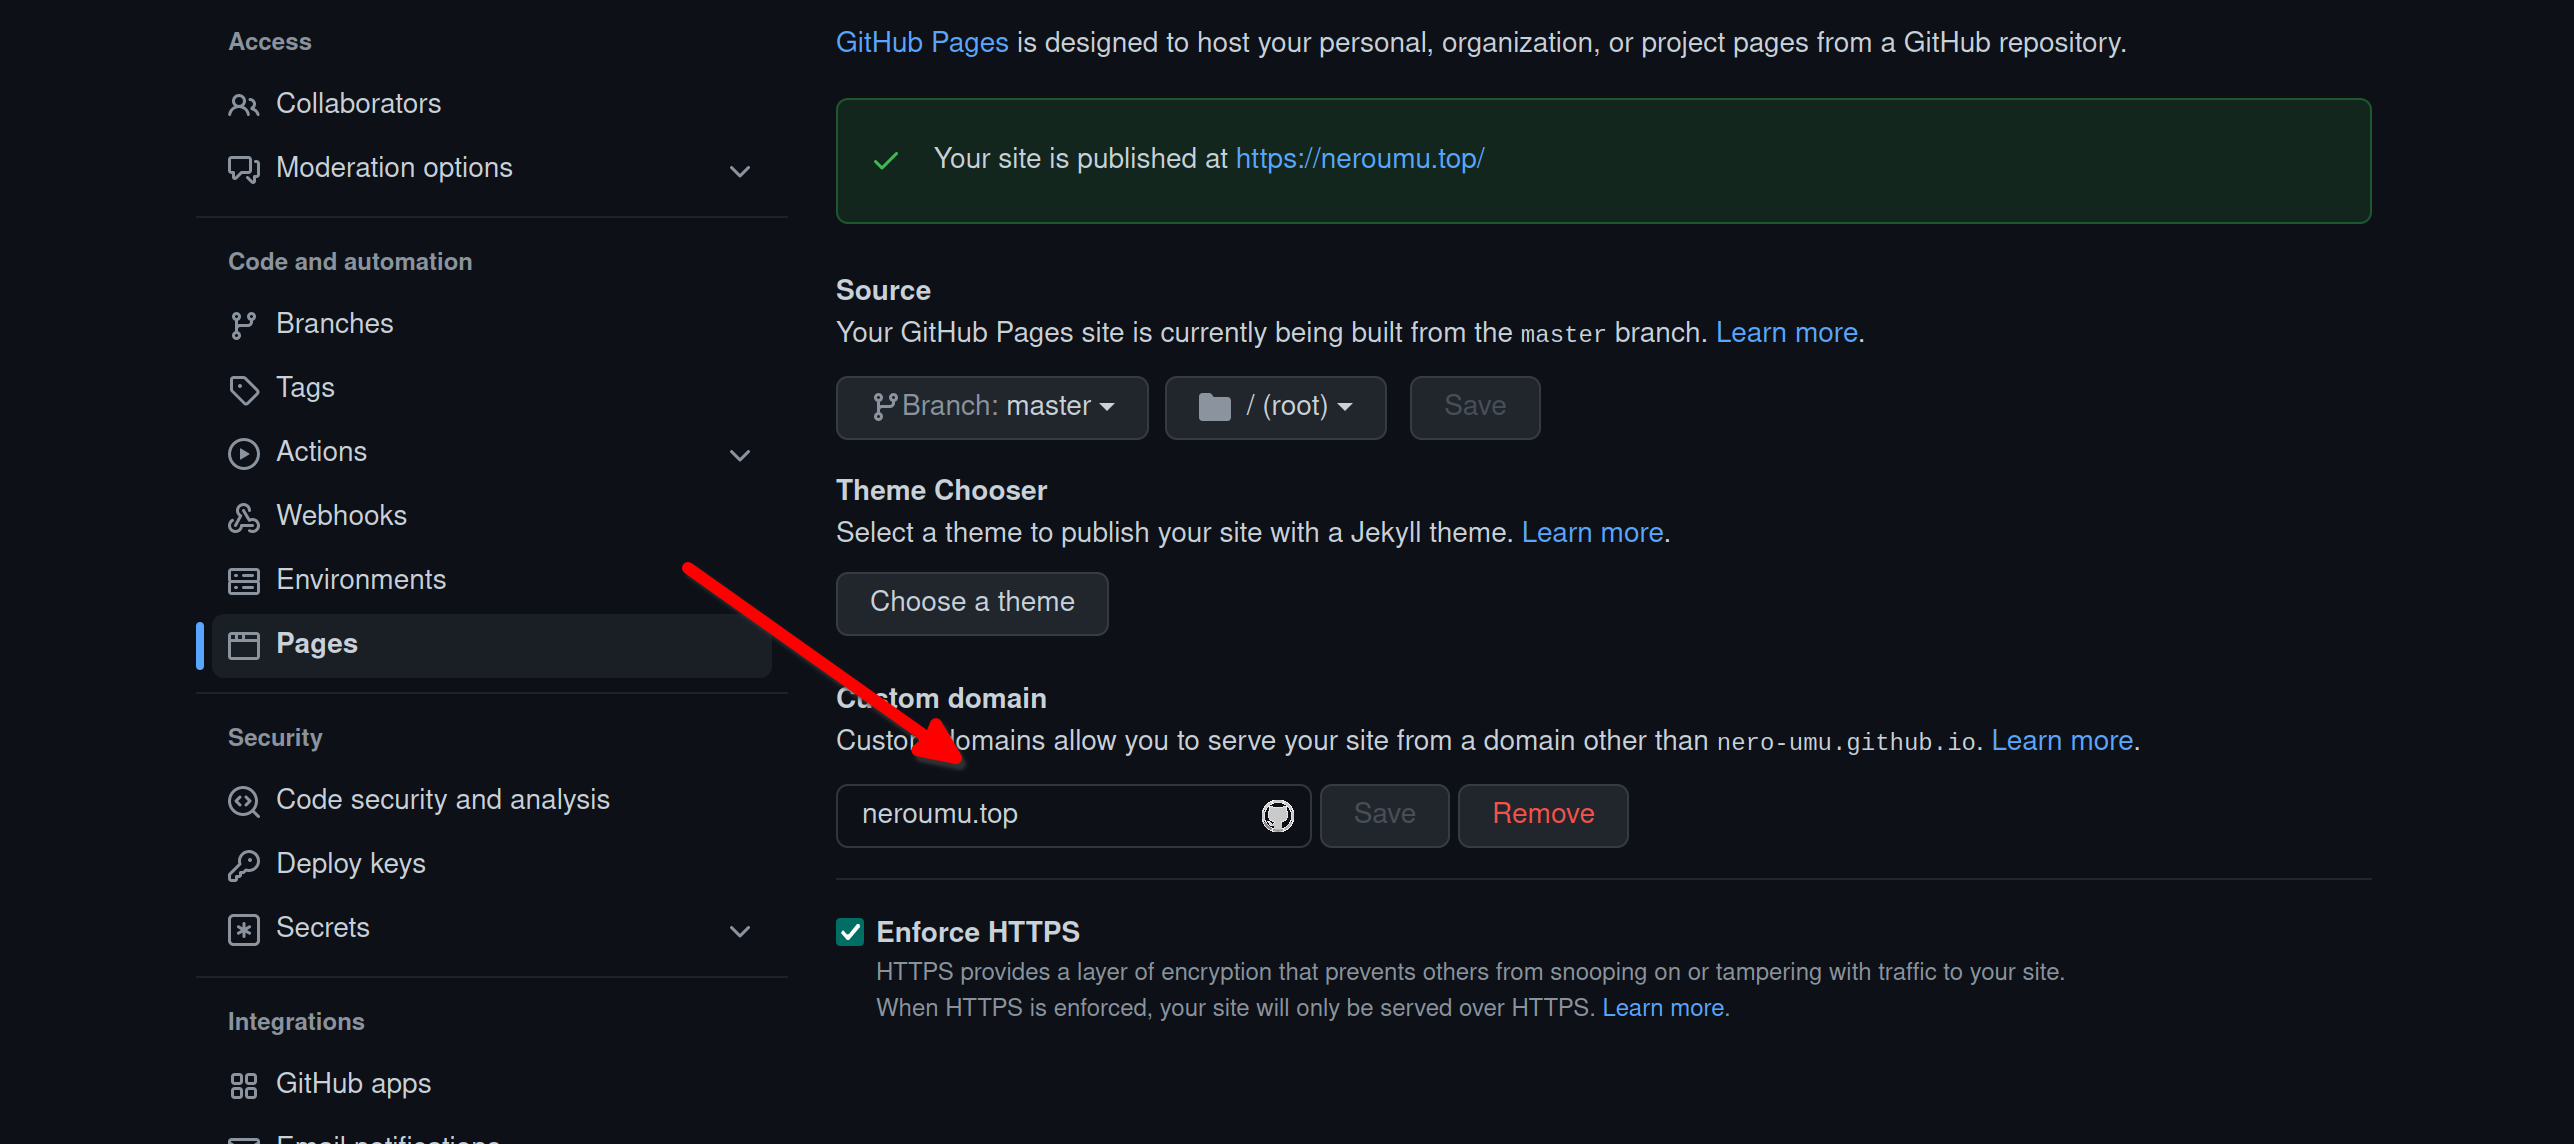
搞定,后面可以自行添加 HTTPS
Hexo官方文档,自行查看: https://hexo.io/zh-cn/
过了这么久了,都有点忘了,这回有回忆起来了,也好,加深了点印象,碰到的问题也能够快速解决 ♪(^∀^●)ノシ